Many coffee lovers want to know how to use a Keurig coffee maker for the perfect cup. The process is quick and easy. Just add water, place your K-Cup, and press a button. In less than a minute, you’ll enjoy smooth, flavorful coffee without any hassle.
A Keurig coffee maker is a convenient tool for coffee lovers. It brews coffee fast, making it perfect for busy mornings. The machine uses small pods filled with coffee grounds. These pods come in many flavors and strengths. Learning to use a Keurig is easy.
You just need to follow a few simple steps. In this guide, we will walk you through each step. From setting up the machine to brewing your first cup, we’ve got you covered. Soon, you’ll be enjoying your favorite coffee with minimal effort. So, let’s get started and make your coffee routine even better!

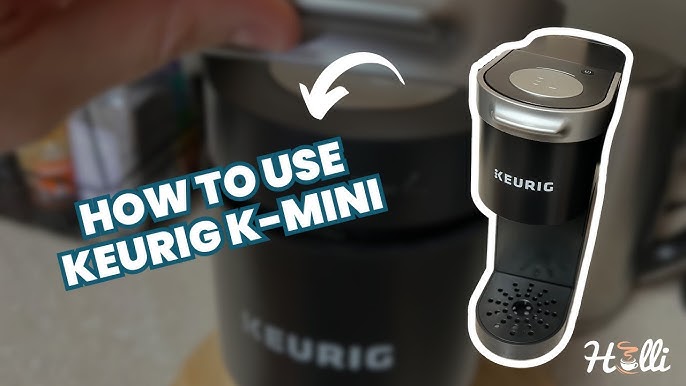
Credit: www.youtube.com
Getting Started
So, you’ve got a new Keurig coffee maker and can’t wait to brew your first cup of coffee. Getting started with your Keurig is simple and quick. In this section, we’ll guide you through the initial steps to get your machine up and running smoothly.
Unboxing Your Keurig
Unboxing your Keurig is the first step toward enjoying a delicious cup of coffee. Carefully remove the coffee maker from its box and set aside all included components. Here’s what you should find:
-
The Keurig coffee maker
-
Water reservoir
-
Drip tray
-
K-Cup pod holder
-
Instruction manual
Before setting up, inspect each component for any visible damage. Read the instruction manual to familiarize yourself with the parts and their functions. It’s essential to understand the basics before you proceed.
If your Keurig includes any accessories like a water filter kit or sample K-Cup pods, make sure to set those aside for later use. Keep the packaging material in case you need to return the unit for any reason.
Once you’ve confirmed that all components are present and undamaged, it’s time to set up your Keurig. Follow these steps for a smooth experience.
Setting Up The Machine
Setting up your Keurig coffee maker is straightforward. Follow these steps to ensure your machine is ready for use:
-
Place the Machine: Find a flat, stable surface near an electrical outlet. Ensure there is enough space for ventilation.
-
Assemble Components: Attach the water reservoir and drip tray to the machine. Ensure they are securely in place.
-
Rinse the Reservoir: Remove the water reservoir and rinse it with fresh water. This step ensures that any dust or residue is washed away.
-
Fill the Reservoir: Fill the water reservoir with clean, filtered water up to the maximum fill line. Place it back on the machine.
-
Plug In: Plug the Keurig into an electrical outlet. The power button is usually located on the top or side of the machine.
-
Prime the Machine: Power on the Keurig and run a cleansing brew without a K-Cup pod. This step helps clean the internal components.
After completing these steps, your Keurig is ready for its first brew. Place a mug on the drip tray, insert a K-Cup pod, and follow the brewing instructions. Enjoy your freshly brewed coffee!
Choosing Coffee Pods
Choosing the right coffee pods for your Keurig can enhance your coffee experience. With so many options available, selecting the perfect pod might seem overwhelming. This guide will help you understand the different types of coffee pods and recommend some of the best brands to try. Let’s dive into the world of Keurig coffee pods!
Types Of Coffee Pods
Coffee pods come in various types, each offering a unique flavor profile and strength. Here are some common types of coffee pods:
-
Single-Origin Pods: These pods contain coffee from a specific region, providing distinct flavors that reflect their origin.
-
Blend Pods: A mix of beans from different regions, these pods offer a balanced flavor.
-
Flavored Pods: Infused with flavors like vanilla, hazelnut, or caramel, these pods add a sweet twist to your coffee.
-
Decaf Pods: Made from decaffeinated beans, perfect for those who enjoy coffee without the caffeine.
-
Specialty Pods: Includes options like espresso, cappuccino, and latte pods, providing a café-style experience at home.
The type of pod you choose depends on your taste preference and the coffee experience you seek. Experimenting with different types can help you find your favorite.
Best Brands To Try
Here are some of the best brands known for their quality coffee pods:
|
Brand |
Specialty |
|---|---|
|
Green Mountain Coffee |
Wide variety of single-origin and blend pods |
|
Starbucks |
Popular for their flavored and specialty coffee pods |
|
Pete’s Coffee |
Known for bold and rich coffee flavors |
|
Donut Shop |
Perfect for those who love classic, medium-roast coffee |
|
Nespresso |
Offers a range of espresso and specialty coffee pods |
Trying different brands can help you find the one that suits your taste. Many brands offer variety packs, which are a great way to sample different flavors without committing to a full box.
To sum up, selecting the right coffee pod involves knowing your preferences and exploring different types and brands. Enjoy your coffee journey with Keurig!
Brewing Your First Cup
Using a Keurig coffee maker can be a delightful experience. Brewing your first cup is simple and quick. This guide will walk you through the steps to ensure you enjoy a perfect cup of coffee every time. Follow these easy steps, and you’ll be sipping your favorite brew in no time.
Filling The Water Reservoir
Before you begin, ensure your Keurig has enough water. The water reservoir is usually located on the side or back of the machine. Here’s how to fill it:
-
Remove the water reservoir lid.
-
Take out the reservoir and fill it with fresh, cold water.
-
Do not exceed the maximum fill line marked on the reservoir.
-
Reattach the water reservoir to the machine and replace the lid.
Using filtered water is recommended for the best taste and to prolong the life of your Keurig. Tap water may contain minerals that could affect the flavor and performance of your coffee maker. Once the reservoir is filled, you are ready to move on to the next step.
Selecting Brew Size
Keurig machines offer different brew sizes to cater to your taste preference. Common sizes include 6 oz, 8 oz, and 10 oz. Here’s how to select the brew size:
-
Turn on the machine and wait for it to heat up. This usually takes a few minutes.
-
Place your favorite coffee pod in the pod holder and close the lid.
-
Select your desired brew size by pressing the corresponding button. Smaller sizes result in stronger coffee, while larger sizes are milder.
Choosing the right brew size can impact the strength and flavor of your coffee. Experiment with different sizes to find the one that suits you best. Some Keurig models come with a strength control button, allowing you to further customize your brew. For a more intense flavor, choose a smaller size or use the strength control option if available.
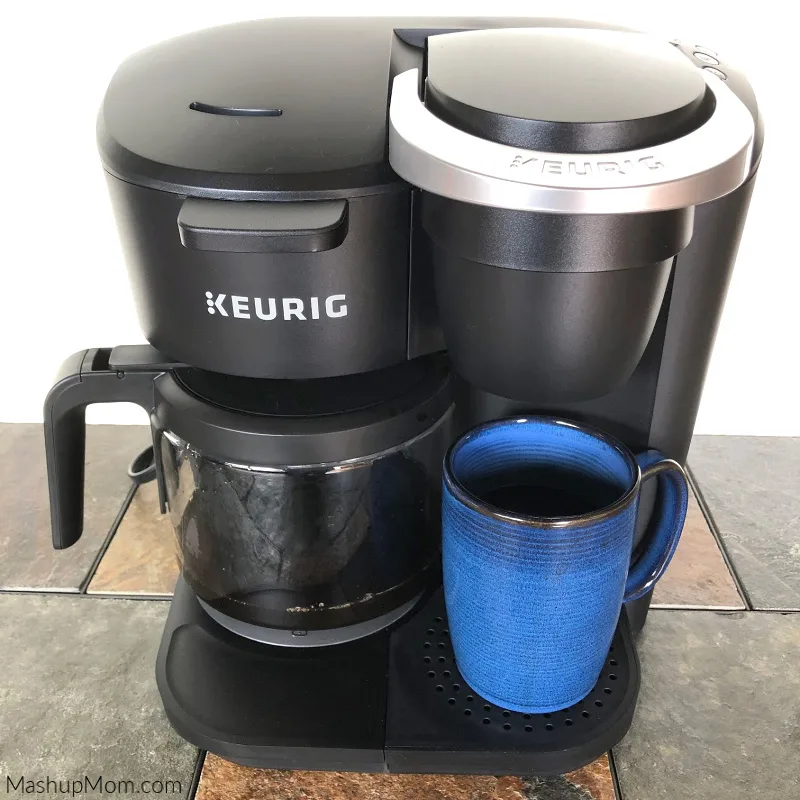
By following these steps, you ensure that every cup of coffee you brew with your Keurig is perfect. Enjoy your freshly brewed coffee!
Credit: www.mashupmom.com
Maintenance Tips
Using a Keurig Coffee Maker is convenient and quick. But, to keep it working well, regular maintenance is necessary. Proper care ensures you enjoy fresh coffee every day. Here are some essential maintenance tips to keep your Keurig in top shape.
Cleaning The Machine
Cleaning your Keurig Coffee Maker regularly is crucial. It prevents the build-up of coffee grounds, oils, and hard water deposits. Follow these steps to keep your machine clean and efficient:
-
Daily Cleaning: After each use, remove the used coffee pod. Wipe the pod holder and the surrounding area with a damp cloth. This prevents coffee residue from building up.
-
Weekly Cleaning: Once a week, remove and clean the drip tray and the water reservoir. Use warm soapy water and a soft sponge. Rinse thoroughly to remove any soap.
-
Monthly Cleaning: Clean the needle that punctures the coffee pods. Use a paper clip to remove any coffee grounds stuck in the needle. Be careful to avoid damage.
|
Cleaning Frequency |
Parts to Clean |
Method |
|---|---|---|
|
Daily |
Pod holder, surrounding area |
Wipe with a damp cloth |
|
Weekly |
Drip tray, water reservoir |
Wash with warm soapy water |
|
Monthly |
Needle |
Clear with a paper clip |
Regular cleaning keeps your coffee tasting fresh and your machine running smoothly.
Descaling Process
Descaling is essential to remove mineral build-up from your Keurig. Hard water can cause calcium deposits that affect the machine’s performance. Follow these steps to descale your Keurig:
-
Turn off the machine and unplug it.
-
Empty the water reservoir and remove the water filter.
-
Mix a descaling solution or use white vinegar with water (1:1 ratio).
-
Fill the water reservoir with the solution.
-
Place a large mug on the drip tray.
-
Run a brew cycle without a coffee pod. Repeat until the reservoir is empty.
-
Rinse the water reservoir with fresh water.
-
Fill the reservoir with fresh water and run several brew cycles to remove any remaining solution.
Descaling should be done every three to six months, depending on the hardness of your water. Regular descaling keeps your coffee tasting great and ensures your machine lasts longer.
Customizing Your Brew
Using a Keurig Coffee Maker can be a delightful experience, especially when you tailor your brew to your liking. Customizing your brew can take your coffee enjoyment to the next level. Whether you prefer a strong, bold cup or a milder, flavored option, the Keurig offers various ways to adjust and experiment. Let’s explore how you can customize your perfect cup of coffee.
Adjusting Brew Strength
The Keurig Coffee Maker allows you to adjust the strength of your brew. This feature is perfect for those who like their coffee strong or prefer a lighter taste. Here’s how you can do it:
-
Choose the Right Pod: Opt for a dark roast if you want a stronger cup. Light roasts offer a milder flavor.
-
Use the Brew Strength Button: Many Keurig models have a “Strong” button. Press this button to make your coffee stronger.
-
Adjust Water Amount: Using less water will give you a more concentrated coffee. Use more water for a lighter brew.
Here’s a quick reference table to help you:
|
Desired Strength |
Pod Type |
Water Amount |
|---|---|---|
|
Strong |
Dark Roast |
6 oz |
|
Medium |
Medium Roast |
8 oz |
|
Mild |
Light Roast |
10 oz |
Remember, the key is to experiment until you find what suits your taste best. Start with these tips and adjust as needed.
Experimenting With Flavors
One of the joys of using a Keurig is the wide range of flavors available. You can experiment with different flavors to find your favorite. Here are some ways to do it:
-
Try Different Pods: Keurig offers many flavored pods, such as vanilla, hazelnut, and caramel. Try a new flavor each week.
-
Add Syrups: Enhance your coffee with flavored syrups. Popular options include vanilla, caramel, and mocha.
-
Use Creamers: Creamers come in various flavors and can add a rich taste to your coffee. Options include French vanilla, hazelnut, and seasonal flavors like pumpkin spice.
Here are some flavor combinations to try:
|
Flavor Pod |
Added Syrup |
Final Taste |
|---|---|---|
|
French Vanilla |
Caramel |
Vanilla Caramel Delight |
|
Hazelnut |
Mocha |
Chocolate Hazelnut |
|
Caramel |
Vanilla |
Caramel Vanilla Swirl |
Experimenting with flavors can be fun and rewarding. Mix and match to find your unique blend. Enjoy the process and discover new favorites.
Troubleshooting Common Issues
Using a Keurig coffee maker can make mornings easier. But, sometimes, you might face issues that interrupt your coffee routine. Troubleshooting these common problems can help you get back to enjoying your favorite brew quickly. Here are some solutions to common issues users face with Keurig coffee makers.
Machine Not Brewing
If your Keurig coffee maker is not brewing, it can be frustrating. Here are some steps to solve the issue:
-
Check the Water Reservoir: Ensure the water reservoir is full and properly seated. Sometimes, the machine won’t brew if the reservoir is not in place.
-
Descale the Machine: Mineral buildup can block the brewing process. Use a descaling solution or a mix of vinegar and water to clean the internal components.
-
Clean the Needles: The needles that puncture the K-cup can get clogged. Use a paper clip to clear any debris from the needles.
-
Reset the Machine: Sometimes, a simple reset can solve the issue. Unplug the machine, wait for a minute, and then plug it back in.
If these steps do not work, the problem might be more complex. Consulting the user manual or contacting Keurig support might be necessary.
Water Not Heating
If your Keurig is not heating water, you won’t get a hot cup of coffee. Here are some troubleshooting tips:
-
Check the Power Source: Ensure the machine is plugged in and the power switch is on. Sometimes, the issue is as simple as a loose power cord.
-
Inspect the Water Pump: The pump might be malfunctioning. Listen for any unusual noises. If the pump is not working, the machine won’t heat water.
-
Descale the Machine: Scale buildup can affect the heating element. Descale your Keurig regularly to prevent this issue.
-
Perform a Reset: Unplug the machine, wait for a few minutes, and then plug it back in. This can sometimes reset the heating element.
If these steps do not solve the problem, the heating element might be faulty. In such cases, contacting Keurig support for further assistance is a good idea.
Innovative Uses
Introduction paragraph about How to Use a Keurig Coffee Maker and Innovative Uses… The Keurig Coffee Maker is not just for brewing coffee. It’s a versatile kitchen gadget that can make various beverages and even assist in cooking. Let’s explore some innovative ways to use your Keurig Coffee Maker beyond the usual cup of joe.
Brewing Tea And Other Beverages
Did you know your Keurig can brew more than just coffee? It’s perfect for making a variety of teas and other hot drinks.
Here are some options:
-
Tea: Use tea pods to brew your favorite blend. You can find options like green, black, and herbal teas.
-
Hot Chocolate: Insert a hot chocolate pod to enjoy a warm, creamy drink.
-
Cider: Brew apple cider pods for a sweet and spicy treat.
Follow these simple steps to brew tea or other beverages:
-
Fill the water reservoir with fresh water.
-
Place your selected pod in the holder.
-
Select the appropriate cup size.
-
Press the brew button and wait for your drink.
You can also make iced versions of these drinks. Brew the beverage on a smaller size setting and pour it over ice.
Cooking With Keurig
The Keurig Coffee Maker can be a handy tool in the kitchen. It can provide hot water quickly for various cooking tasks.
Here are some cooking ideas:
-
Instant Oatmeal: Place instant oatmeal in a bowl and brew hot water over it.
-
Soup: Use the hot water to prepare instant soup or noodles.
-
Rice: Add hot water to instant rice for a quick meal.
Steps to use Keurig for cooking:
-
Fill the water reservoir with fresh water.
-
Run the machine without a pod to get hot water.
-
Use the hot water for your cooking needs.
Using the Keurig for cooking can save time and make meal prep easier. It’s a convenient way to get hot water quickly without using the stove.

Credit: www.youtube.com
Environmental Considerations
Using a Keurig coffee maker is convenient and quick. But it raises environmental concerns. Many worry about the waste from coffee pods. Let’s explore how to make your Keurig experience greener with some practical tips.
Recycling Coffee Pods
Recycling coffee pods helps reduce waste. Many pods are made from plastic and aluminum. These materials can be recycled if processed correctly.
Here are some steps to recycle your coffee pods:
-
Check the Pod Type: Not all pods are recyclable. Check the packaging for recycling symbols.
-
Separate Components: Remove the aluminum lid and empty the coffee grounds. Rinse the plastic part.
-
Local Recycling Programs: Some communities have special programs for coffee pod recycling. Check with your local recycling center.
-
Mail-In Programs: Some companies offer mail-in recycling programs. You can send used pods back to them.
Below is a simple table to summarize these steps:
|
Step |
Action |
|---|---|
|
1 |
Check the Pod Type |
|
2 |
Separate Components |
|
3 |
Local Recycling Programs |
|
4 |
Mail-In Programs |
Eco-friendly Alternatives
Besides recycling, consider eco-friendly alternatives. These options reduce the environmental impact.
Here are some alternatives to traditional coffee pods:
-
Reusable Pods: These pods can be filled with your own coffee. They are washable and reusable.
-
Biodegradable Pods: Made from plant-based materials, these pods break down naturally.
-
Compostable Pods: Similar to biodegradable pods, but designed for composting. They enrich the soil when composted.
Reusable pods are a great option. They save money and reduce plastic waste. Biodegradable and compostable pods are also good choices. They are better for the environment and still offer convenience.
Here’s a quick comparison:
|
Pod Type |
Environmental Impact |
|---|---|
|
Reusable Pods |
Very Low |
|
Biodegradable Pods |
Moderate |
|
Compostable Pods |
Low |
Choosing eco-friendly alternatives helps the planet. It’s a small change with a big impact.
Frequently Asked Questions
How Do You Use A Keurig For The First Time?
To use a Keurig for the first time, fill the water reservoir, insert a K-cup, place a mug, and press the brew button. Follow the machine’s instructions for any additional setup steps.
Can You Use Any Coffee In A Keurig?
No, you need to use K-cups specifically designed for Keurig machines. Some models also support reusable coffee filters for ground coffee.
How Often Should You Clean Your Keurig?
You should clean your Keurig at least once a month. This includes descaling and wiping down the exterior to ensure optimal performance.
Why Is My Keurig Not Brewing?
If your Keurig isn’t brewing, check for water reservoir issues, clogged needles, or power problems. Regular cleaning can help prevent these issues.
Conclusion
Using a Keurig coffee maker is simple and convenient. Follow the steps outlined. Fill the water reservoir. Insert a coffee pod. Press the brew button. Your coffee is ready in minutes. Clean the machine regularly for best results. Enjoy a fresh cup every time.
Keurig makes coffee brewing easy and quick. Perfect for busy mornings or relaxed weekends. With these tips, your coffee experience will improve. Happy brewing!
