Brewing coffee with a percolator is easy once you know how to make coffee in a percolator. It delivers rich, robust flavor that coffee lovers enjoy.
Percolators have been around for over a century. They provide a unique way to brew coffee, different from modern methods. Using one may seem old-fashioned, but it’s easy and fun. Whether you’re camping or at home, a percolator can deliver a perfect cup.
In this guide, we’ll show you the steps to make coffee in a percolator. From choosing the right coffee grounds to the brewing process, we’ll cover everything you need to know. Get ready to enjoy a delicious cup of coffee made the classic way.
Choosing The Right Percolator
Making coffee in a percolator can be a delightful experience, but choosing the right percolator is crucial. With various types available, understanding their features and sizes can enhance your percolator coffee brewing journey. Let’s dive into what makes the best coffee percolator for you.
Types Of Percolators
There are different types of percolators, each with unique features. Knowing these types helps you select one that fits your needs.
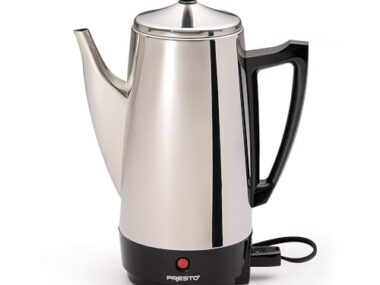
- Electric Percolators: These are convenient and easy to use. They come with built-in heating elements, making them suitable for home use. Simply plug them in, add water and coffee, and let them brew.
- Stovetop Percolators: These are traditional coffee brewing methods. They require a stove for heating and are usually made of stainless steel or aluminum. They are perfect for campers or those who love a hands-on approach.
- Glass Percolators: These offer a visual experience as you can watch the coffee percolation process. They are usually stovetop models and can be more fragile than metal ones.
Each type has its advantages. For instance, electric percolators provide ease and convenience, while stovetop percolators offer a more traditional brewing experience. Glass percolators, on the other hand, give you a clear view of the brewing process.
Advantages of Percolators include robust flavor extraction and the ability to brew larger quantities. The choice of percolator depends on your lifestyle and preferences.
Size Considerations
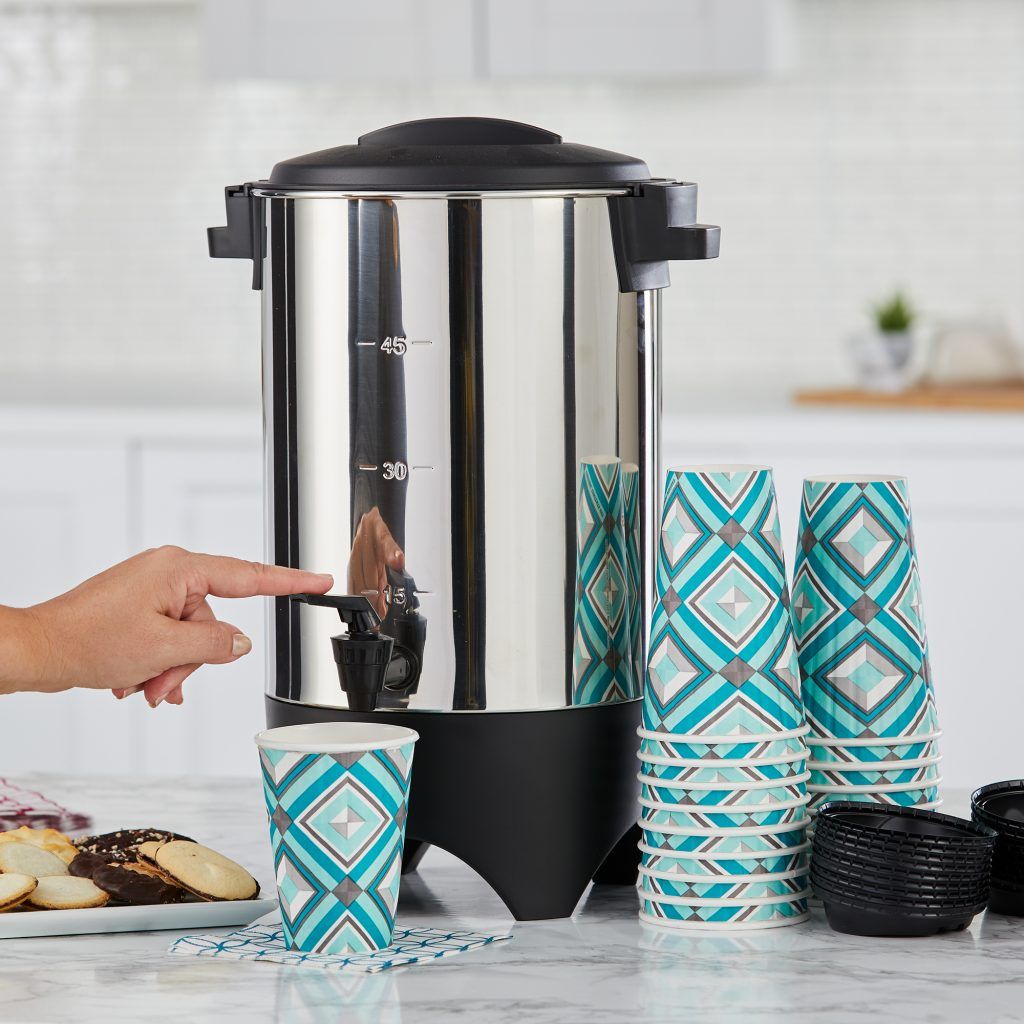
Choosing the right size is essential for an optimal coffee brewing experience. Percolators come in various sizes, usually measured by the number of cups they can brew. Consider your needs before selecting a size.
Small Percolators: Ideal for individuals or couples. They usually brew 2 to 4 cups of coffee, making them perfect for daily use. These are also great for limited kitchen space.
Medium Percolators: Suitable for small families or small gatherings. They can brew 6 to 8 cups of coffee, providing enough for a few people without occupying too much space.
Large Percolators: Designed for larger families or parties. They can brew 10 or more cups, making them perfect for entertaining guests or office use.
| Percolator Size | Number of Cups | Best For |
|---|---|---|
| Small | 2-4 | Individuals/Couples |
| Medium | 6-8 | Small Families/Gatherings |
| Large | 10+ | Large Families/Parties |
In addition to size, consider the coffee-to-water ratio. Too much water can dilute the flavor, while too little can make it too strong. Finding the right balance is key to enjoying a perfect cup of coffee.
Remember, the best coffee percolator suits your specific needs. Whether you prefer a small, medium, or large percolator, the goal is to achieve the desired flavor and quantity. Happy brewing!
Credit: shopproseries.com
Selecting Coffee Beans
Making coffee in a percolator is a classic method that many coffee enthusiasts love. The aroma, the sound, and the robust flavor can make your mornings delightful. One of the most important steps in this process is selecting the right coffee beans. The beans you choose will greatly affect the taste and quality of your coffee. In this section, we will explore how to select the best coffee beans for percolation.
Best Beans For Percolation
Choosing the best beans for percolation can make a significant difference in your coffee’s flavor. Here are some tips to help you select the right beans:
- Medium to Dark Roast: Medium to dark roast beans work best in a percolator. They provide a rich, bold flavor that stands up to the percolation process.
- Freshness: Always opt for freshly roasted beans. Fresh beans have more aromatic oils and flavors, which enhance the taste of your coffee.
- Origin: Beans from regions like Colombia, Brazil, and Ethiopia are known for their rich flavors and are excellent choices for percolation.
Here is a table to summarize the best beans for percolation:
| Type | Characteristics |
|---|---|
| Medium Roast | Balanced flavor, less acidic |
| Dark Roast | Bold, smoky flavor |
| Fresh Beans | Strong aromatic oils and flavors |
Grinding Options
The grind size of your coffee beans is crucial when using a percolator. A proper grind ensures even extraction and prevents over-extraction. Here are some grinding options to consider:
- Coarse Grind: Coarse grind is the most suitable for percolators. It prevents the coffee from becoming too bitter and allows for a smoother brew.
- Consistency: Ensure the grind is consistent. Uneven grind sizes can lead to uneven extraction, affecting the coffee’s taste.
- Grinder Types: Use a burr grinder for the most consistent grind. Blade grinders can produce uneven particles, which may not be ideal for percolation.
Here is a comparison of grinder types:
| Grinder Type | Advantages | Disadvantages |
|---|---|---|
| Burr Grinder | Even grind size, better flavor | More expensive |
| Blade Grinder | Less expensive | Inconsistent grind size |
Always grind your beans just before brewing to preserve the freshness and flavor. This small step can make a big difference in the quality of your coffee.
Preparing The Percolator
Making coffee in a percolator can be a delightful and nostalgic experience. To get the best flavor, it’s important to prepare the percolator correctly. Proper preparation ensures your coffee is clean, rich, and full of aroma. Let’s dive into the steps for preparing your percolator.
Cleaning The Percolator
Before you start making coffee, ensure the percolator is clean. A clean percolator prevents any leftover residues from affecting the taste of your coffee. Here’s how to clean it:
- Disassemble the Percolator: Separate all the parts, including the coffee basket, stem, and lid.
- Rinse with Warm Water: Use warm water to rinse all parts. This helps remove loose coffee grounds.
- Use Mild Detergent: Mix a small amount of mild detergent with warm water. Clean each part thoroughly using a soft sponge. Avoid using abrasive materials as they can scratch the surface.
- Scrub Stains Gently: If there are stubborn stains, use a mixture of baking soda and water. Apply the paste to the stains and scrub gently.
- Rinse Thoroughly: Ensure all soap residues are washed away. Leftover soap can affect the taste of your coffee.
- Dry Completely: Use a clean towel to dry all parts or air dry them completely before reassembling. This prevents any water spots or rust.
A clean percolator makes a big difference in the flavor of your coffee. Make sure to clean it after each use to maintain the best taste and prolong the life of your percolator.
Setting Up Components
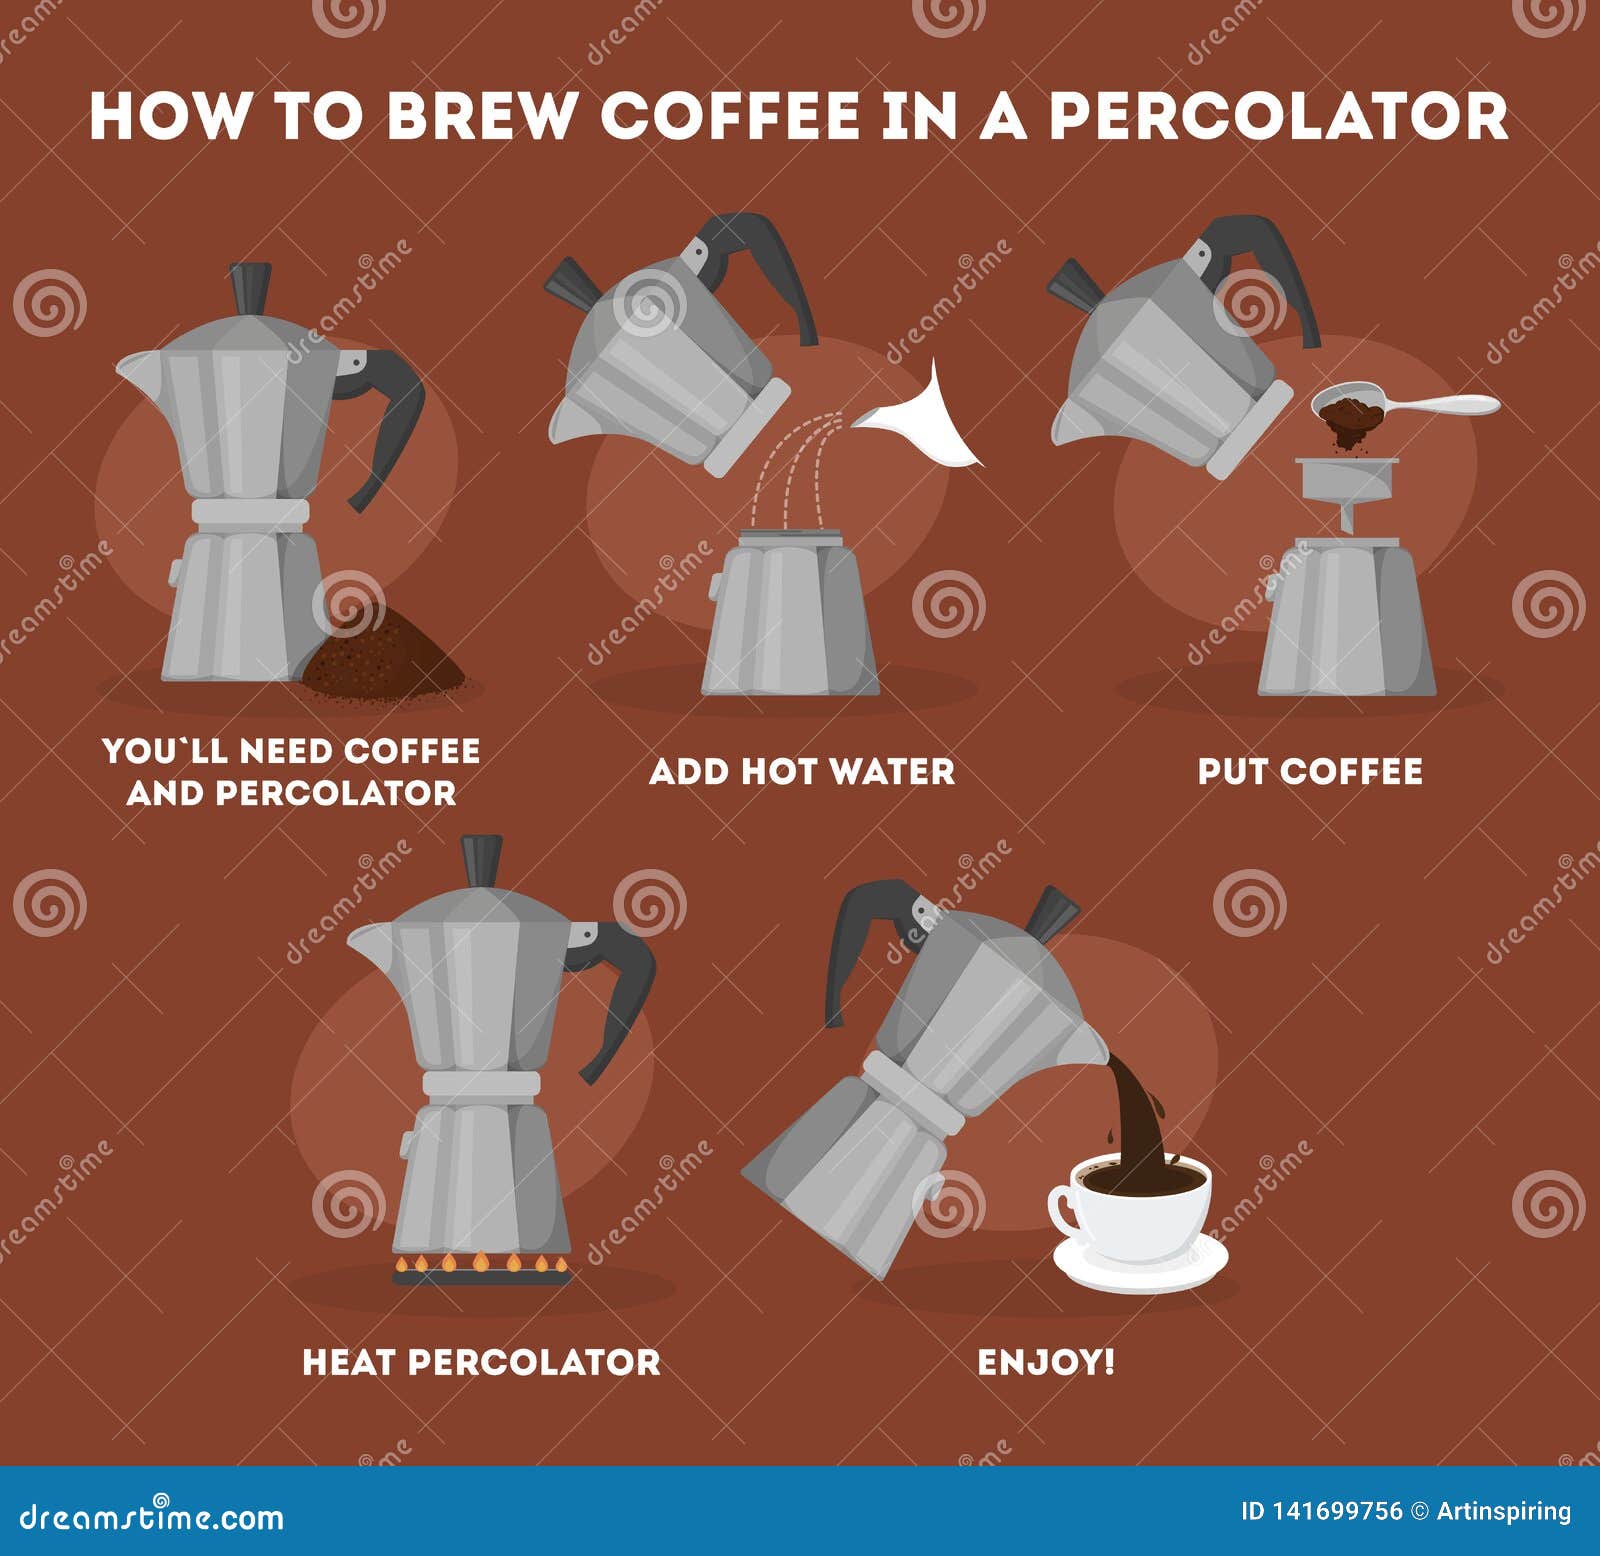
Once your percolator is clean, it’s time to set up the components. Correct assembly ensures even brewing. Follow these steps:
- Add Water: Pour fresh, cold water into the bottom chamber. Use the markings inside the percolator for guidance. For a stronger coffee, use less water. For a lighter brew, use more water.
- Insert the Stem: Place the stem into the center of the water chamber. Ensure it stands upright and is securely in place.
- Add Coffee Grounds: Place the coffee basket on top of the stem. Add your preferred amount of coffee grounds. For best results, use a coarse grind. A general guideline is to use one tablespoon of coffee per cup of water.
- Assemble the Lid: Secure the lid on the coffee basket. This prevents coffee grounds from spilling into the water chamber.
- Close the Percolator: Place the top chamber lid securely. Ensure all parts are tightly fitted to avoid any leaks during brewing.
With the components set up properly, your percolator is ready to brew. Each step in the setup process is crucial for a perfect cup of coffee. Enjoy the process and savor the aroma as your coffee percolates to perfection.
Credit: www.dreamstime.com
Measuring Coffee And Water
Making coffee in a percolator can be a delightful experience. One of the most important steps is measuring the coffee and water correctly. The right balance ensures your coffee is neither too strong nor too weak. Let’s explore how to get the perfect coffee-to-water ratio and how to adjust it to suit your taste.
Coffee-to-water Ratio
Getting the coffee-to-water ratio right is crucial. Too much coffee can make it bitter, while too little can make it watery. A good starting point is using one tablespoon of ground coffee for every cup (8 ounces) of water. Here’s a simple guide:
- 1 cup of water (8 oz) – 1 tablespoon of coffee
- 2 cups of water (16 oz) – 2 tablespoons of coffee
- 4 cups of water (32 oz) – 4 tablespoons of coffee
Using a measuring spoon ensures consistency. Fill the percolator with cold water up to the desired level. Then, add the ground coffee to the basket. Make sure the coffee is evenly spread in the basket. Avoid overfilling the basket, which can cause overflow and a bitter taste.
Here’s a table for a quick reference:
| Water (cups) | Water (oz) | Ground Coffee (tbsp) |
|---|---|---|
| 1 | 8 | 1 |
| 2 | 16 | 2 |
| 4 | 32 | 4 |
Remember, these are starting points. You can adjust based on your taste. Always use fresh, clean water for the best results.
Adjusting For Taste
Everyone has different preferences when it comes to coffee strength. You might prefer a stronger brew or a milder one. Adjusting the coffee-to-water ratio can help you find your perfect cup.
If the coffee is too strong, try using less ground coffee. For example, if you are making 4 cups, instead of 4 tablespoons, use 3.5 tablespoons. This slight reduction can make a big difference.
On the other hand, if the coffee is too weak, add more ground coffee. If you are using 2 tablespoons for 2 cups and it tastes weak, increase it to 2.5 tablespoons.
Here are a few tips to help you adjust:
- Start small: Make small adjustments. A half tablespoon can change the flavor.
- Consistency: Use the same type of coffee each time to compare results.
- Record: Note the amount used and the taste result. This helps in finding the right balance.
Experimenting with different ratios can be fun. Keep in mind that the grind size of the coffee also affects the taste. A finer grind can make the coffee stronger, while a coarser grind can make it milder. Find what works best for you and enjoy your perfect cup of percolator coffee.
Brewing Process
Making coffee in a percolator is a timeless method that many coffee lovers cherish. This process might seem old-fashioned, but it still brews a robust and flavorful cup of coffee. The brewing process involves a few crucial steps that ensure your coffee turns out perfect every time. Let’s explore these steps in detail.
Heating The Percolator
Heating the percolator is the first step in the brewing process. Start by filling the base of the percolator with cold water. The amount of water should match the number of cups you plan to make. Next, insert the metal filter basket into the percolator. Add your coffee grounds to the basket. Use a coarse grind to prevent the grounds from slipping through the filter.
Place the percolator on a stove burner. If you have an electric percolator, plug it in and turn it on. The goal is to gradually heat the water. Rapid heating can result in bitter coffee. Set your stove to medium heat. This ensures a steady increase in temperature.
Here’s a quick guide on how much coffee to use:
| Number of Cups | Coffee Grounds (Tablespoons) |
|---|---|
| 2 | 2-3 |
| 4 | 4-6 |
| 6 | 6-9 |
| 8 | 8-12 |
As the water heats, it will travel up the central tube, then disperse over the coffee grounds. You’ll hear a gentle bubbling sound. This indicates that the percolation process has begun. Avoid high heat to prevent boiling over. Proper heating is essential for a smooth, rich cup of coffee.
Timing The Brew
Timing is crucial in the percolation process. Once the water starts percolating, set a timer. Generally, percolating coffee takes about 7-10 minutes. This duration can vary based on the strength you prefer. A longer brewing time results in a stronger coffee, while a shorter time yields a milder taste.
Keep an eye on the color of the coffee. It should turn from light to dark brown. This color change indicates the extraction of flavors from the coffee grounds. If your percolator has a glass knob, you can observe this change easily.
Here are some timing guidelines:
- For light coffee: 7 minutes
- For medium coffee: 8-9 minutes
- For strong coffee: 10 minutes
After the desired brewing time, turn off the heat. Let the percolator sit for a minute. This allows the coffee grounds to settle at the bottom. Carefully remove the coffee basket. This prevents any grounds from getting into your coffee.
Pour the coffee slowly into your cup. Enjoy the rich aroma and taste of your freshly brewed coffee. Timing the brew perfectly ensures a delightful coffee experience each time.
Serving Your Coffee
Serving your freshly brewed coffee from a percolator is an experience that should be savored. The rich aroma and robust flavor deserve to be presented in the best way possible. Below are some tips on how to serve your coffee for maximum enjoyment.
Choosing The Right Mug
The right mug can enhance your coffee-drinking experience. A good mug keeps your coffee hot and feels comfortable in your hand.
Consider the following when choosing a mug:
- Material: Ceramic and stainless steel are popular choices. Ceramic mugs are great for retaining heat, while stainless steel mugs are durable and often insulated.
- Size: A standard coffee mug holds about 8-12 ounces. Choose a size that fits your coffee needs.
- Handle: Ensure the handle is large enough for a comfortable grip. This is especially important if you have larger hands.
- Design: Aesthetic appeal matters too. Choose a design that makes you happy each time you drink your coffee.
A table summarizing the key points:
| Factor | Consideration |
|---|---|
| Material | Ceramic for heat retention, stainless steel for durability |
| Size | 8-12 ounces |
| Handle | Large enough for a comfortable grip |
| Design | Choose a design that you like |
Adding Cream And Sugar
Personalize your coffee by adding cream and sugar. Here are some tips to get the perfect balance:
Cream:
- Start with a small amount and increase to taste. Too much can overpower the coffee.
- Consider the type of cream. Options include half-and-half, heavy cream, and non-dairy alternatives like almond milk or oat milk.
Sugar:
- Start with one teaspoon per cup. Add more if you prefer a sweeter taste.
- Try different types of sugar. White sugar, brown sugar, and natural sweeteners like honey or agave syrup each offer unique flavors.
Here is a simple process to follow:
- Pour your coffee into the mug.
- Add a small amount of cream. Stir and taste.
- Add more cream if needed.
- Add one teaspoon of sugar. Stir and taste.
- Adjust sweetness to your preference.
Finding the right balance of cream and sugar can elevate your coffee experience. Experiment to discover what you enjoy the most.
Troubleshooting Common Issues
Making coffee in a percolator can be a delightful experience. But it can sometimes bring a few challenges. This guide will help you troubleshoot common issues. Let’s make your coffee taste perfect every time.
Bitter Coffee
Bitter coffee can ruin your morning. Several factors can cause this problem. Here are some tips to fix it:
- Grind Size: If your coffee is too fine, it can lead to over-extraction. Use a medium-coarse grind for percolators.
- Brew Time: Over-brewing can make coffee bitter. Ensure the percolator runs for 7-10 minutes.
- Water Temperature: Boiling water can extract too many compounds, causing bitterness. Aim for water just below boiling.
Below is a table summarizing the causes and solutions for bitter coffee:
| Cause | Solution |
|---|---|
| Fine Grind | Use Medium-Coarse Grind |
| Long Brew Time | Limit to 7-10 Minutes |
| Boiling Water | Keep Water Just Below Boiling |
Weak Brew
Weak coffee can be disappointing. Here are some common causes and solutions:
- Insufficient Coffee Grounds: Use the right coffee-to-water ratio. A standard ratio is one tablespoon of coffee per 8 ounces of water.
- Coarse Grind: If the grind is too coarse, the water will pass through too quickly. Use a medium-coarse grind.
- Short Brew Time: Ensure the percolator runs for the full 7-10 minutes.
Check the table below for a quick overview:
| Cause | Solution |
|---|---|
| Too Little Coffee | Use Proper Ratio |
| Coarse Grind | Use Medium-Coarse Grind |
| Short Brew Time | Ensure 7-10 Minutes |
Cleaning And Maintenance
Making coffee in a percolator can be a delightful experience, offering a rich and robust flavor. But to ensure your percolator continues to produce the perfect cup of coffee, regular cleaning and maintenance are essential. Here are some practical tips to keep your percolator in top condition.
Daily Cleaning Tips
Maintaining your percolator with daily cleaning is crucial to keep it working efficiently and to preserve the taste of your coffee. Follow these simple steps:
- Empty the Percolator: After brewing, always empty the percolator of any leftover coffee. This prevents old coffee from affecting the taste of new brews.
- Rinse with Warm Water: Rinse all parts of the percolator with warm water. Make sure to clean the basket, stem, and the pot itself.
- Use Mild Soap: Occasionally, use mild dish soap to wash the parts. Avoid harsh chemicals that can damage the percolator.
- Scrub Gently: Use a soft sponge or cloth to scrub the inside and outside of the percolator. This helps remove coffee stains and residues.
- Dry Thoroughly: After washing, dry all parts with a clean towel. Ensure no moisture is left inside to prevent mold and mildew.
Keeping the percolator clean daily enhances the flavor of your coffee and extends the life of your machine.
Long-term Care
Long-term maintenance is just as important as daily cleaning. It ensures that your percolator remains in excellent condition for years to come. Here are some tips:
- Deep Clean Monthly: Once a month, deep clean your percolator. Fill the pot with a mixture of water and white vinegar (1:1 ratio). Run a full percolating cycle and then rinse thoroughly with water.
- Descale Regularly: Depending on the hardness of your water, descale the percolator every 2-3 months. Use a descaling solution or a mixture of water and citric acid.
- Inspect Parts: Regularly check the percolator’s parts for wear and tear. Replace any damaged or worn-out parts to maintain optimal performance.
- Store Properly: When not in use, store the percolator in a dry place. Avoid storing with the lid closed to prevent odors and mold.
- Use Quality Water: Use filtered or bottled water to reduce mineral buildup and improve the taste of your coffee.
By following these long-term care tips, you’ll keep your percolator in great shape and enjoy delicious coffee every time.

Credit: www.youtube.com
Frequently Asked Questions
How Do You Use A Percolator Coffee Maker?
To use a percolator, add water to the bottom chamber. Place coffee grounds in the basket. Assemble the percolator and heat it. Let it brew for 7-10 minutes.
What Grind Size For Percolator Coffee?
For a percolator, use a coarse grind size. This prevents grounds from passing through the filter. It ensures even extraction.
How Long Should Coffee Percolate?
Coffee should percolate for 7-10 minutes. Over-percolating can cause bitterness. Adjust the time based on your taste preference.
Can I Use A Percolator On Any Stove?
Yes, you can use a percolator on gas, electric, or induction stoves. Ensure it’s compatible with your stove type.
Conclusion
Brewing coffee in a percolator is simple and rewarding. Follow the steps carefully. Use fresh coffee grounds for the best taste. Adjust the brewing time to your preference. Clean your percolator regularly to maintain flavor. Enjoy the rich, robust coffee made with your own hands.
Perfect for a cozy morning or a friendly gathering. Experiment with different coffee beans and grind sizes. This method brings a classic touch to your daily routine. Happy brewing!

